
| Yamaha Rhino Pedal System Review
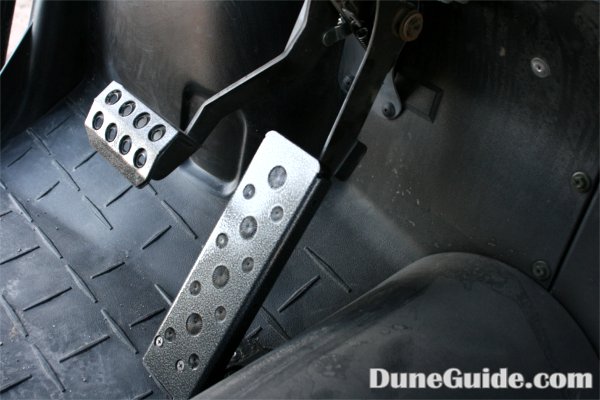
The Hardware:The slider part of the pedal assembly is made from a twocomponent polyurethane. It’s physical properties include high shore”D” hardness, high abrasion resistance and high heat resistance. Thealuminum substrate is chemically treated prior to the molding process to createa bond between the aluminum and the polyurethane. Once molded the aluminumand polyurethane act as one to create a highly durable assembly. The assembly also comes with all stainlessmounting hardware and hinge. Gas Pedal Installation:1. Disconnect stock gas pedal return spring.
2. Remove throttle cable from bulkhead.
3. Mark line 1/2″ down from top of stock gas pedal.
4. Where hinge lays, grind down raised area on floor board sohinge lays flush.
5. Lay new pedal over stock gas pedal so that it is centered andthe top of the new pedal rests 1/2″ from the top of the stock pedal.
6. With hinge flat on the floor, mark location of hinge.
7. Remove hinge from pedal 8. Place hinge over pre-marked hinge location and mark holelocations
9. Inside hole (closest to tunnel) – drill 5/32″ andclearance slightly. Install #10 sheet metal screw.
10. Outside hole – drill 7/32″ hole through floorpan. Install 10-32 machine screw, washer and nut.
11. Reinstall new pedal on hinge and tighten.
12. Reinstall stock throttle cable. 13. Reinstall stock gas pedal return spring. 14. Check pedal assembly for proper fit and function prior tooperating vehicle. 15. Periodically check all mounting hardware. 16. Periodically check throttle cable for proper adjustment tomake sure you are getting full throttle when pedal is to the floor. Thisadjustment has nothing to do with the new pedal, but even a stock Rhino willneed to be checked and adjusted. Conclusions:The gas pedal is much more comfortable and easy to use. Regardless of foot position, you are able to apply proper amount of pressure tothe pedal. We highly recommend this simple addition to your Yamaha Rhino. |


No Comments